![]()
WP Pixel Integration with Google Tag Manager
Note
The following instructions consist of two stages: the first describes adding the basic WP code (Embed Script, required).
The second covers full service coding (depending on agreed requirements).
Ask your account manager for details.
Stage 1: Embed Script
Step 1: Accessing the GTM panel
Log in to your Google Tag Manager account and select the appropriate container where you want to place the code.
Step 2: Adding a new tag
- Select the Tags tab from the left-hand menu.
- Click New to create a new tag.
- Enter a name, such as
WP Pixel, to help identify it later.
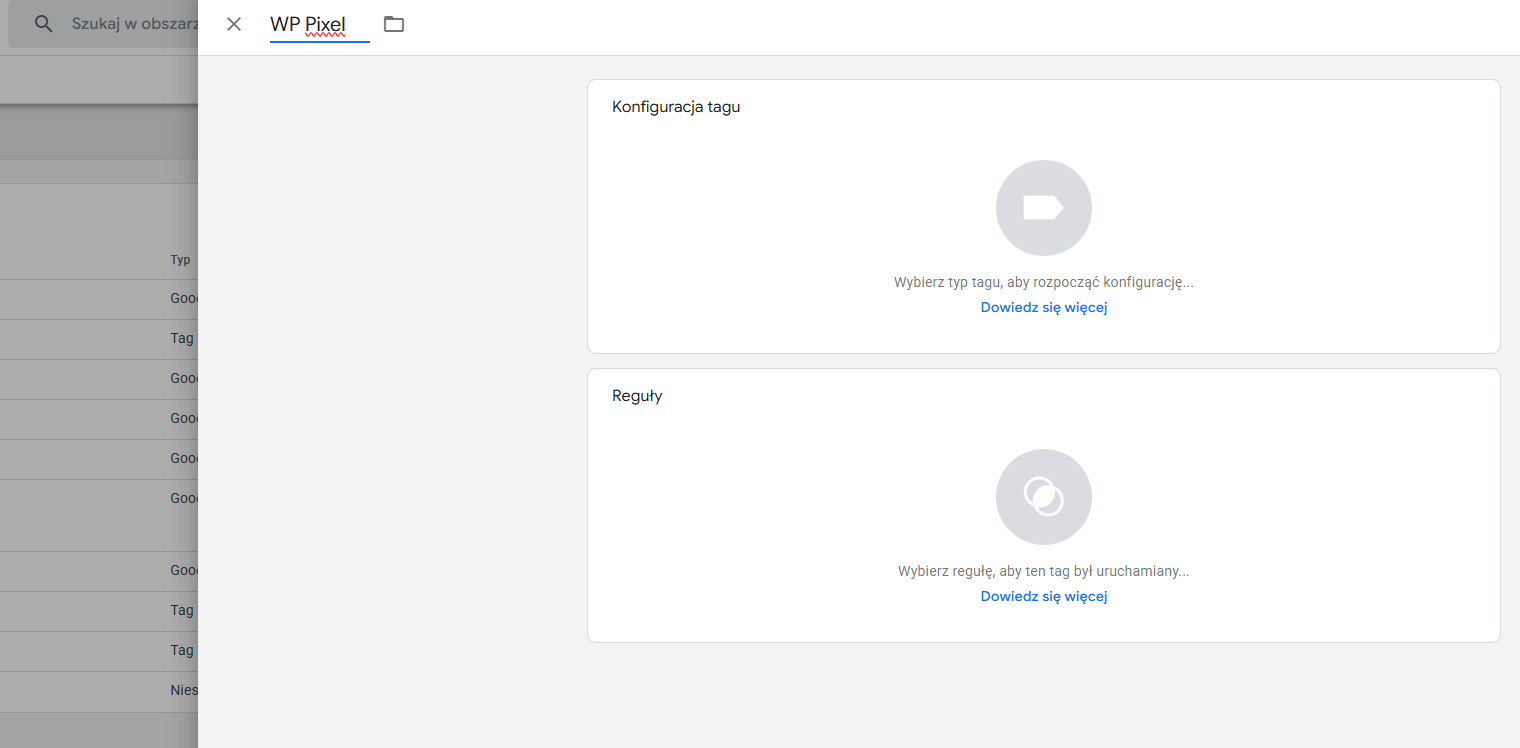
Step 3: Configure the Tag
- In the Tag Configuration section, choose the tag type Custom HTML.
- In the HTML field, paste the code below, replacing the PIXEL_ID phrase (in two places in the code) with your individual ID provided by your supervisor or generated in the WP Ads panel:
<script>
    !function(w,p,e,v,n,t,s){w['WphTrackObject'] = n;
    w[n] = window[n] || function() {(w[n].queue=w[n].queue||[]).push(arguments)},
    w[n].l = 1 * new Date(), w[n].v = '2.0', t=p.createElement(e), s=p.getElementsByTagName(e)[0],
    t.async=1;t.src=v;s.parentNode.insertBefore(t,s)}(window,document,'script',
    'https://pixel.wp.pl/w/PIXEL_ID/tr.js', 'wph');
    wph('init', 'PIXEL_ID');
    wph('go');
</script>
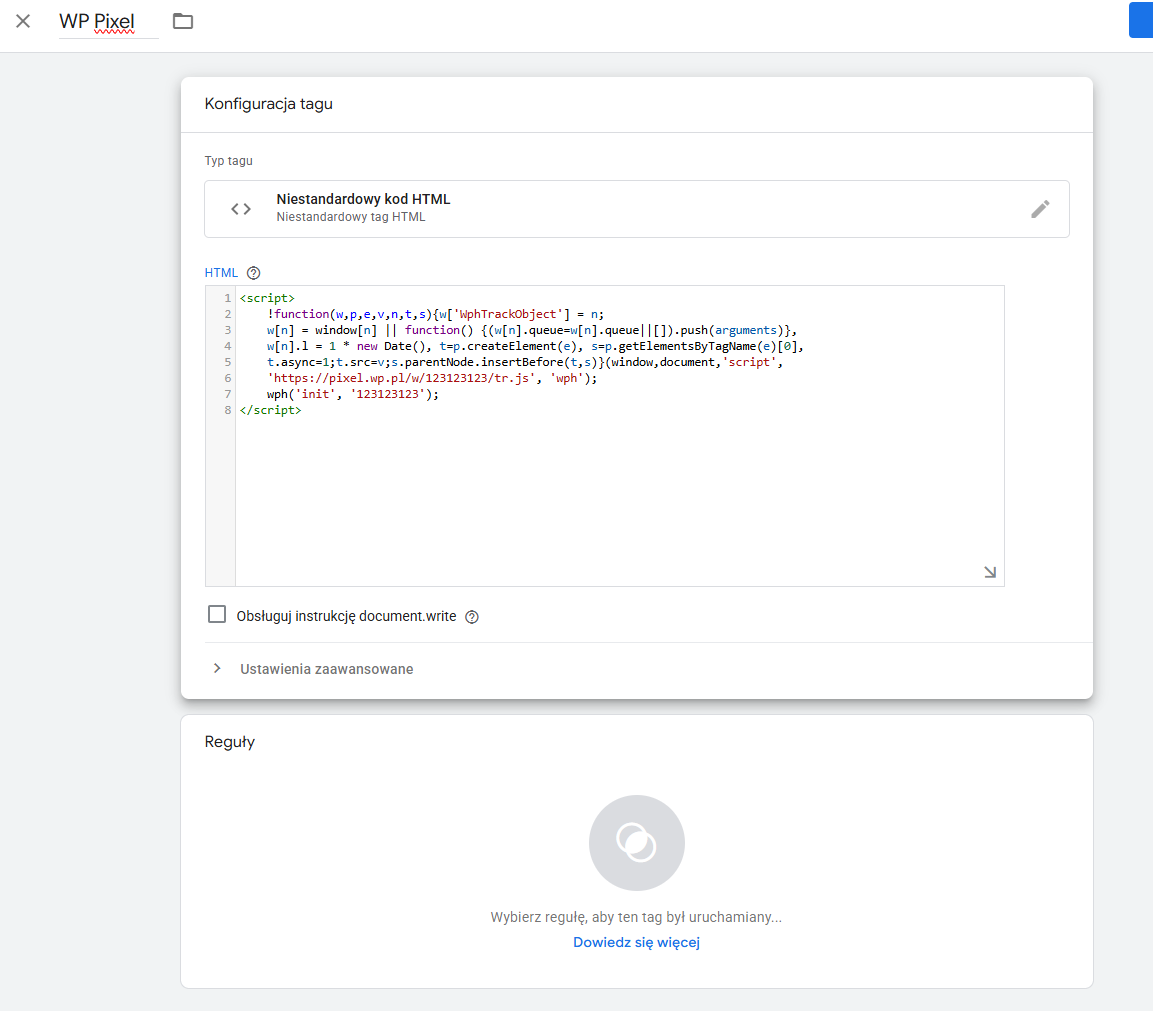
Important!
Remember to replace the PIXEL_ID with your own Pixel ID!
The website administrator is responsible for properly embedding the WP Pixel tracking script, i.e., after the user has given consent.
The script should be embedded in its entirety, and calling the wph('go') function within it signifies the user's consent to tracking.
Withdrawing user consent should result in calling the wph('stop') function.
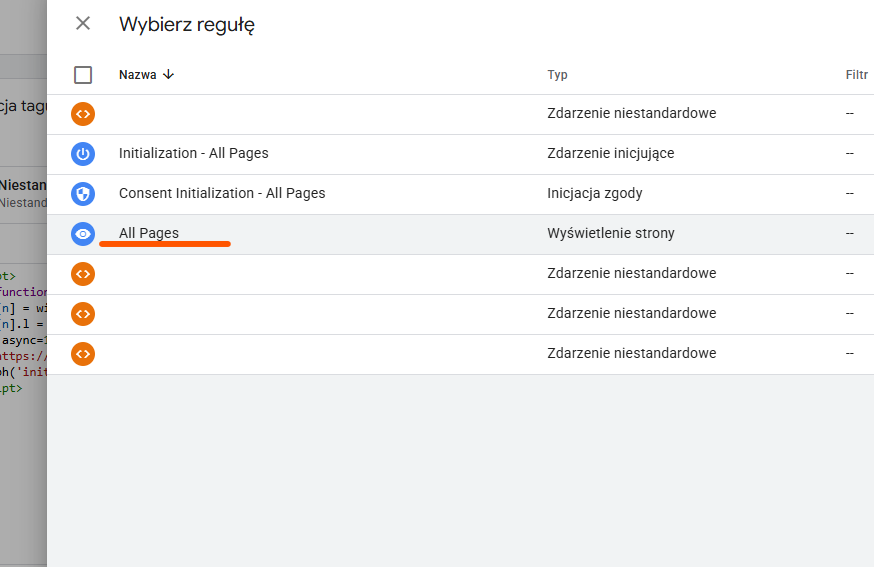
Step 4: Set the Trigger
- Click Triggering.
- Select the All Pages trigger and (if possible) the "consent" custom event - the moment the user gives consent so that the code runs on every page of the site.
Step 5: Save and publish
- Click Save to store the tag configuration.
- Then click Submit to publish the changes.
Stage 2: Full service coding
Note
This guide is for reference only. Each service configuration may differ, so variations may occur during setup.
A description of individual codes is available here: E-commerce event implementation
Step 1: View code
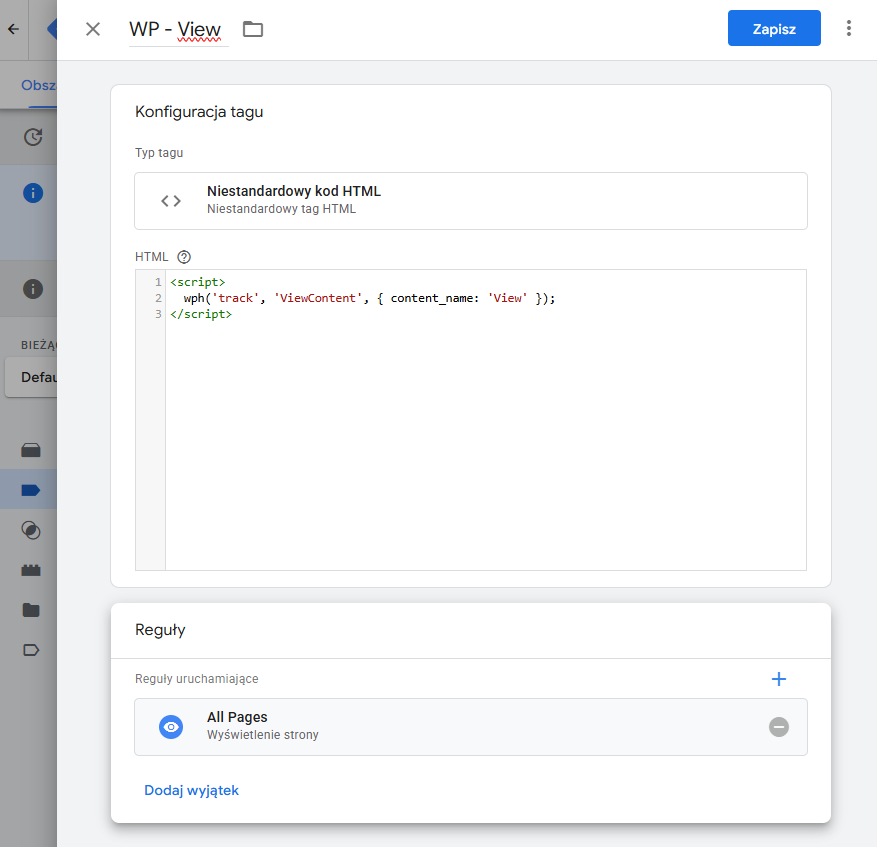
- To embed each code, just like with the embed script, create a new tag: Tags -> New. Enter a name, e.g.,
WP - View. - In the Tag Configuration section, select Custom HTML. Paste the following code in the HTML field:
<script>
  wph('track', 'ViewContent', { content_name: 'View' });
</script>
- In the Triggering section, select the All Pages trigger.
- Save the changes. The final configuration should look like this:
Step 2: ProductList code
Important
These instructions assume the availability of data in the GA4 standard. If this standard is not provided, please add variables and triggers according to the service's capabilities. If you require consultation or assistance, please contact your WP Pixel Technical Support representative.
- Start by creating a variable. Go to the Variables tab. In the User-Defined Variables section, click New.
- Select Custom JavaScript and paste the following code. At this stage, much depends on the website configuration, the proposed code should be treated as a suggestion that needs to be verified whether it works better, in particular the set of data available under the {{ecommerce.impressions}} variable.
function(){
  var dl = {{ecommerce.impressions}};
  var contents = [];
  for(var i= 0; i < dl.length; i++){
    stock = (dl[i].stocklevel > 0)
    contents.push({
    id: String(dl[i].id),
    name: dl[i].name,
    category: dl[i].category,
    price: Number(Number(dl[i].price).toFixed(2)),
    in_stock: stock
    })
  }
  return contents
}
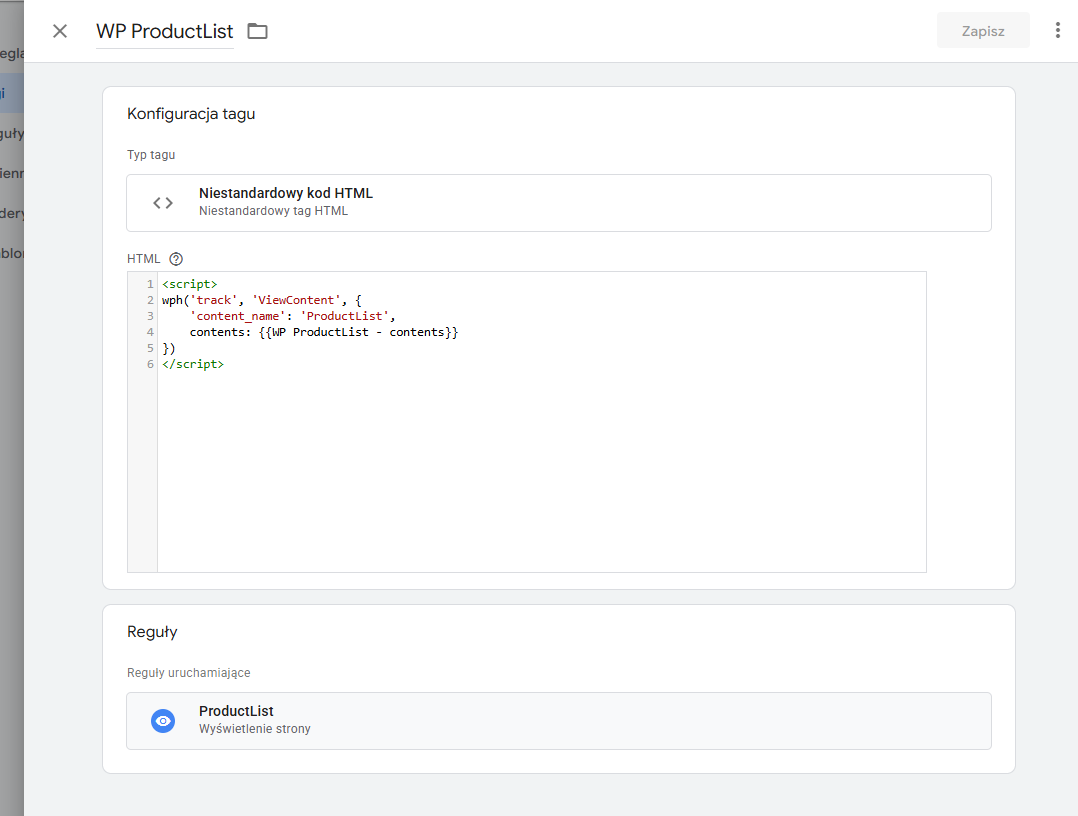
- Save changes in Variables, then add a new Tag named, for example,
WP - ProductList. - In Custom HTML, paste the following code:
<script>
    wph('track', 'ViewContent', {
        'content_name': 'ProductList',
        currency: {{ecommerce.currency}},
        contents: {{WP - ProductList}}
    })
</script>
Step 3: ViewProduct code
- Similar to the previous step, create a Variable, add Custom JavaScript, and paste the following code. You can reuse the previous code, modifying it to return information about a single product.
function(){
  var dl = {{ecommerce.detail.products}};
  var stock = (dl[0].stocklevel > 0)
  var contents = [{
    id: dl[0].id,
    name: dl[0].name,
    category: dl[0].category,
    price: Number(Number(dl[0].price).toFixed(2)),
    in_stock: stock
  }];
  return contents
}
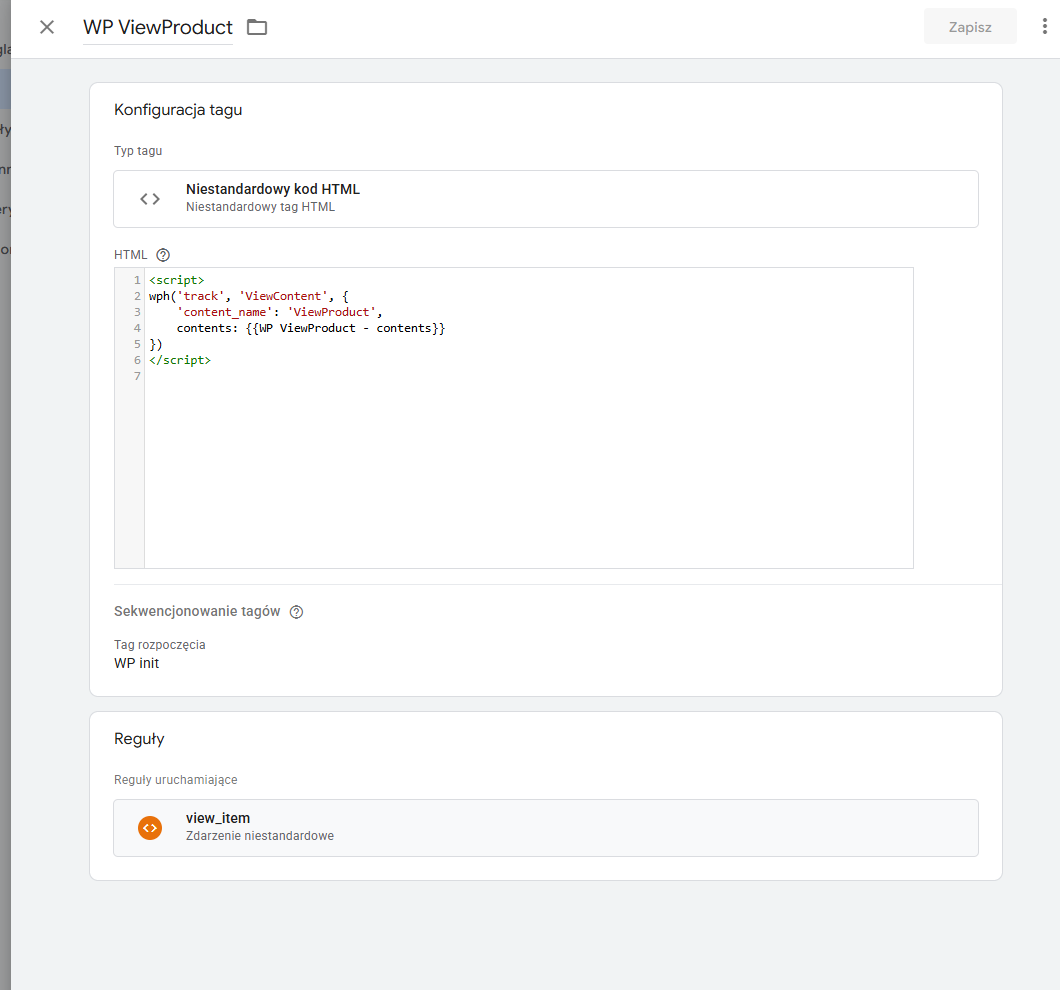
- Save the changes, create a new Tag, and name it, e.g.,
WP - ViewProduct. - In Custom HTML, paste the following code:
<script>
  wph('track', 'ViewContent', {
    'content_name': 'ViewProduct',
    currency: {{ecommerce.currency}},
    contents: {{WP - ViewProduct}}
  })
</script>
Step 4: AddToCart code
- Similar to the previous step, create a Variable, add Custom JavaScript, and paste the following code. Modify it so that it returns information about products in the cart.
function(){
  var dl = {{ecommerce.items}};
  var contents = [{
      id: dl[0].item_id,
      name: dl[0].item_name,
      price: dl[0].price,
      category: dl[0].item_category,
      quantity: dl[0].quantity
    }];
  return contents
}
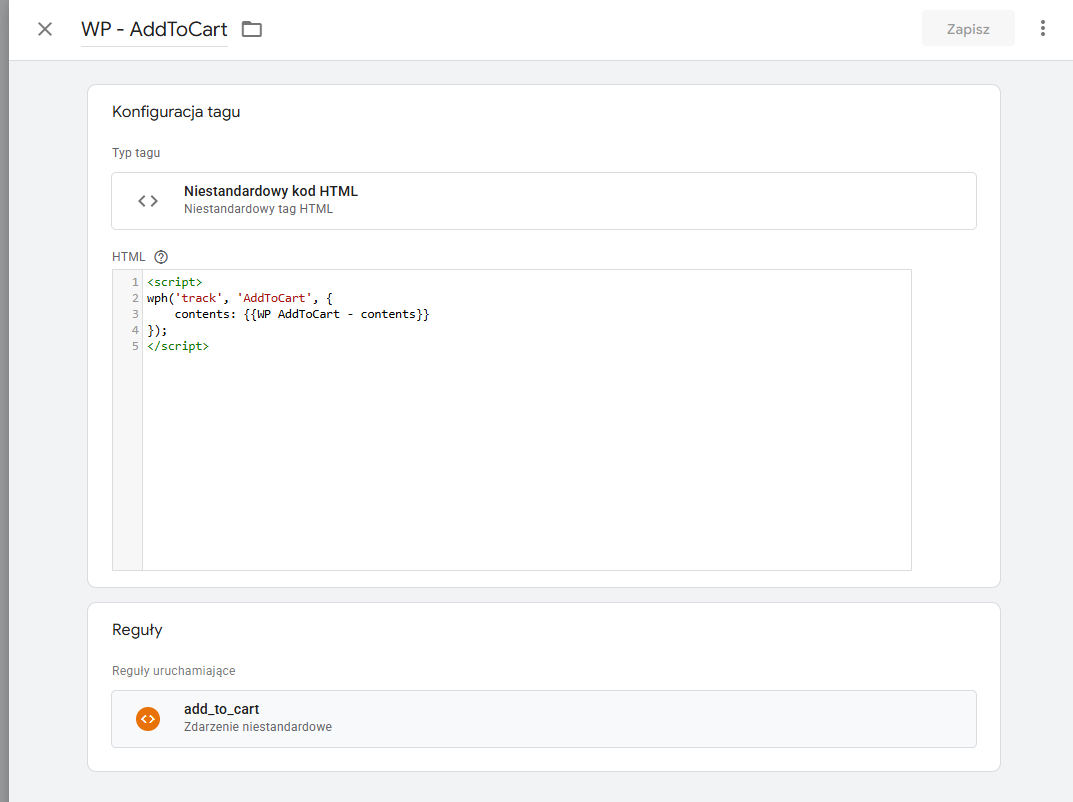
- Save the changes, create a new Tag, and name it, e.g.,
WP - AddToCart. - In Custom HTML, paste the following code:
<script>
  wph('track', 'AddToCart', {
    currency: {{ecommerce.currency}},
    contents: {{WP - AddToCart}}
  });
</script>
Step 5: ViewCart Code
- Similar to the previous step, we create Variables, add Custom JavaScript, and paste the code below. At this stage, we can reuse the previous code, modifying it so that it returns information about the products that have been added to the cart.
Note
The following code is for demonstration purposes only. In some cases, depending on the website configuration, code modification may be required. The main goal is to return information about the products added to the cart.
function(){
  var dl = {{ecommerce.items}};
  var contents = [];
  for(var i = 0; i < dl.length; i++){
    contents.push({
      id: dl[i].id == undefined ? dl[i].item_id : dl[i].id,
      name: dl[i].name == undefined ? dl[i].item_name : dl[i].name,
      price: dl[i].price,
      category: dl[i].category == undefined ? dl[i].item_category : dl[i].category,
      quantity: dl[i].quantity
    })
  }
  return contents
}
- Save the changes, create a new Tag, and name it for example:
WP - ViewCart. - In Custom HTML, paste the following code:
<script>
  wph('track', 'ViewCart', {
    currency: {{ecommerce.currency}},
    contents: {{WP - ViewCart}}
  });
</script>
- In the Triggering section, select the ViewCart trigger – or an equivalent one that fires when the user confirms the products in the cart.
- Save the changes.
Step 6: StartOrder Code
- Similar to the previous step, we create Variables, add Custom JavaScript, and paste the code below. At this stage, we can reuse the previous code, modifying it so that it returns information about the products that have been added to the cart.
Note
The following code is for demonstration purposes only. In some cases, depending on the website configuration, code modification may be required. The main goal is to return information about the products added to the cart.
function(){
  var dl = {{ecommerce.items}};
  var contents = [];
  for(var i = 0; i < dl.length; i++){
    contents.push({
      id: dl[i].id == undefined ? dl[i].item_id : dl[i].id,
      name: dl[i].name == undefined ? dl[i].item_name : dl[i].name,
      price: dl[i].price,
      category: dl[i].category == undefined ? dl[i].item_category : dl[i].category,
      quantity: dl[i].quantity
    })
  }
  return contents
}
- Save the changes, create a new Tag, and name it for example:
WP - StartOrder. - In Custom HTML, paste the following code:
<script>
  wph('track', 'StartOrder', {
    currency: {{ecommerce.currency}},
    contents: {{WP - StartOrder}}
  });
</script>
- In the Triggering section, select the StartOrder trigger – or an equivalent one that fires when the user confirms the products in the cart.
- Save the changes.
Step 7: Purchase code
- Similar to the previous step, create a Variable, add Custom JavaScript, and paste the following code. Modify it to return information about products from the Thank You Page.
function(){
  var dl = {{ecommerce.items}};
  var contents = [];
  for(var i = 0; i < dl.length; i++){
    contents.push({
      id: dl[i].id == undefined? dl[i].item_id : dl[i].id,
      name: dl[i].name == undefined? dl[i].item_name : dl[i].name,
      price: dl[i].price,
      category: dl[i].category == undefined? dl[i].item_category : dl[i].category,
      quantity: dl[i].quantity
    })
  }
  return contents
}
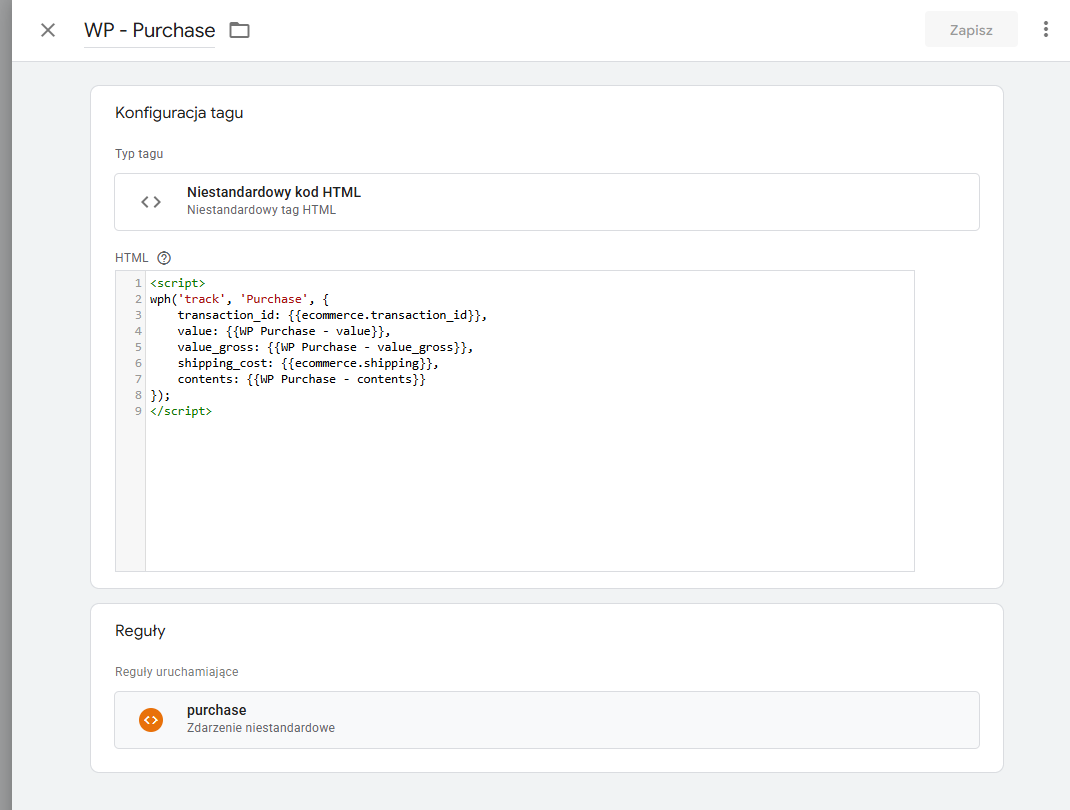
- Save the changes, create a new Tag, and name it, e.g.,
WP - Purchase. - In Custom HTML, paste the following code:
<script>
  wph('track', 'Purchase', {
    transaction_id: {{ecommerce.transaction_id}},
    value: {{ecommerce.value}},
    value_gross: {{ecommerce.value_gross}},
    shipping_cost: {{ecommerce.shipping}},
    currency: {{ecommerce.currency}},
    contents: {{WP - Purchase}}
  });
</script>
Done!
Your WP Pixel has been successfully imported and configured 🎉
Warning
The Plugin is provided “AS IS”, WITHOUT ANY WARRANTIES, either express or implied, including but not limited to implied warranties of merchantability, fitness for a particular purpose, proper functioning, compatibility with external platforms (such as Shopify, WooCommerce, PrestaShop, or other e-commerce systems), or compatibility with other plugins. Wirtualna Polska Media S.A. does not warrant that the Plugin will be error-free, operate without interruption, or meet the User’s expectations.
TO THE MAXIMUM EXTENT PERMITTED BY LAW, WIRTUALNA POLSKA MEDIA S.A. DISCLAIMS ALL LIABILITY for any damages arising from the use of or inability to use the Plugin, including indirect, consequential, or incidental damages, loss of profits, data, or business interruption, regardless of the legal basis of the claim.
Wirtualna Polska Media S.A. may, but is not obligated to, update the Plugin. The company shall not be liable for any issues resulting from updates, changes to APIs or infrastructures of external platforms (e.g., Shopify, WooCommerce, PrestaShop, or other e-commerce systems), or interactions with other software. The User is responsible for testing the Plugin before production use and bears sole responsibility for maintaining compatibility within their environment. By using the Plugin, the User accepts these terms and assumes all risks associated with its use.
The above provisions do not exclude liability for damages caused intentionally by Wirtualna Polska Media S.A., nor in any cases where such exclusion would be contrary to mandatory provisions of law.